There are many things to consider, from the location and lighting setup to camera placement and lens choice. With over 30 years of experience, Andy Taylor ACS is a pro at working these elements to create aesthetically pleasing cinematic imagery. He explains what it takes to deliver professional quality interviews, which flow and cut together perfectly without the need for a large crew and fully decked-out television studio.
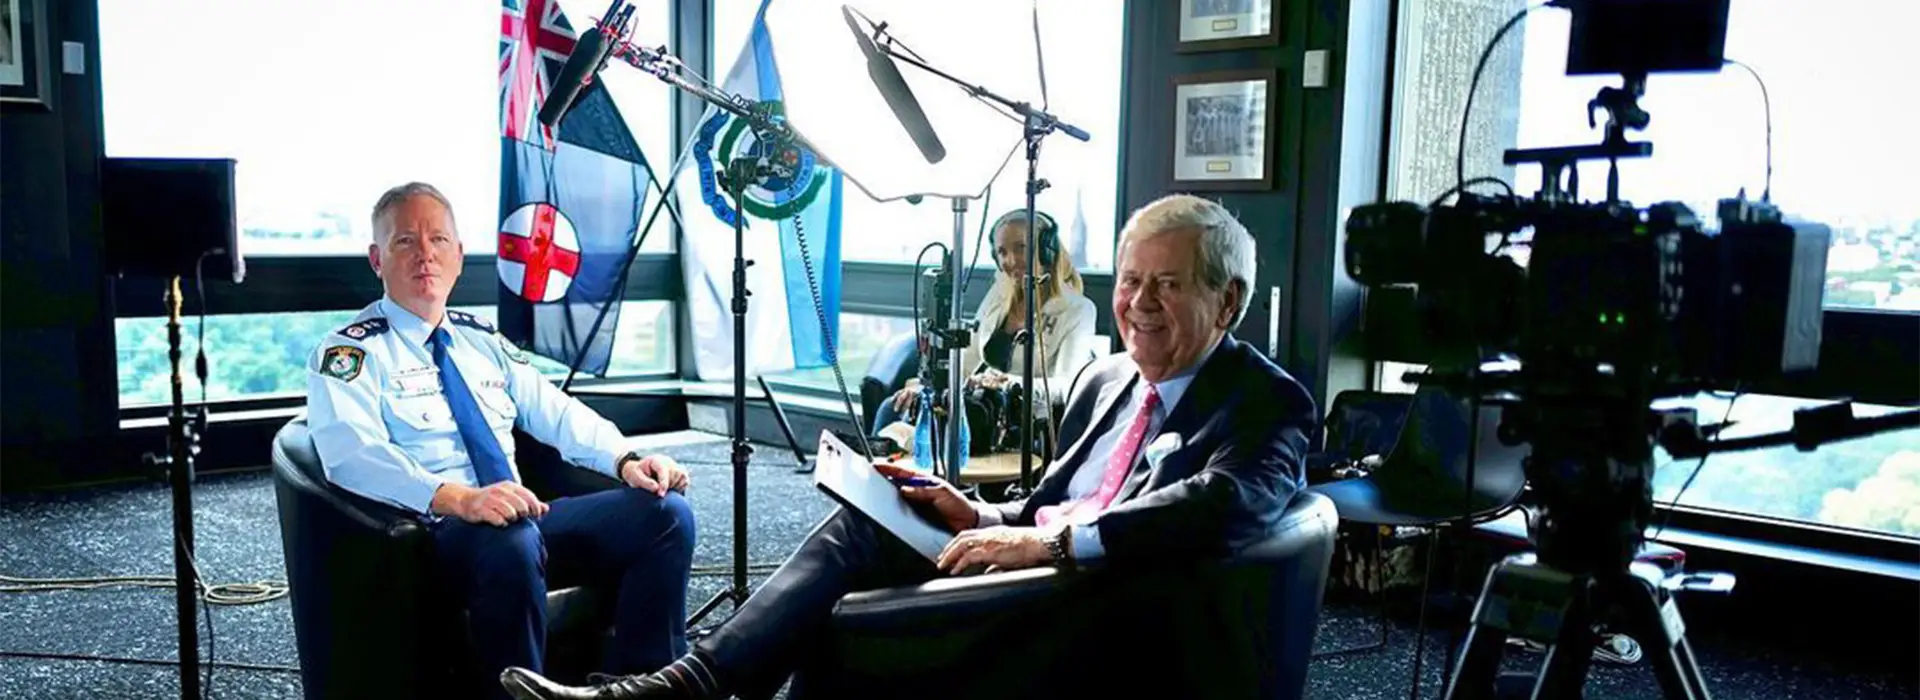
A huge part of Andy’s job as the cinematographer comes down to creating something interesting within the limitations and the conditions which you’re dealt. Locations can often be very bland and small, such as: lounge rooms, hotel rooms, corporate spaces, or government buildings. You may not always have an ideal location with the perfect backdrop, so it’s sometimes a matter of making it work by selecting a camera and lens combinations, along with the use of creative lighting to assist you in delivering the best images, maximise production values and help tell the story.
Andy has filmed interviews in more than 100 countries, all over the globe with Australia’s most respected reporters and presenters, for TV shows such as 60 Minutes, Four Corners and Australian Story. He has a tried-and-true system, which includes using a versatile and reliable camera/lighting kit, but there are many other things to consider, and decisions need to be made in a certain order. Andy has developed a mental checklist which he sub-concisely ticks off as he prepares for a shoot, and he applies this thought process to every job.
His impressive resume includes the names of some of the world’s highest profile figures.
“I was often shooting rock stars, international celebrities, politicians, royalty, terrorists and warlords - some friendly, others hostile,” he says.
“Whether I’m filming Will Ferrell in Pebble Beach, Sir David Attenborough in London, or a three day shoot with the Foo Fighters at their secret LA Studio – the end goal is always the same: to film an interview that looks classy, natural and cinematic. I try to make the most of the locations presented to me and work within the time constraints and various restrictions that I’m dealt with on each shoot.”
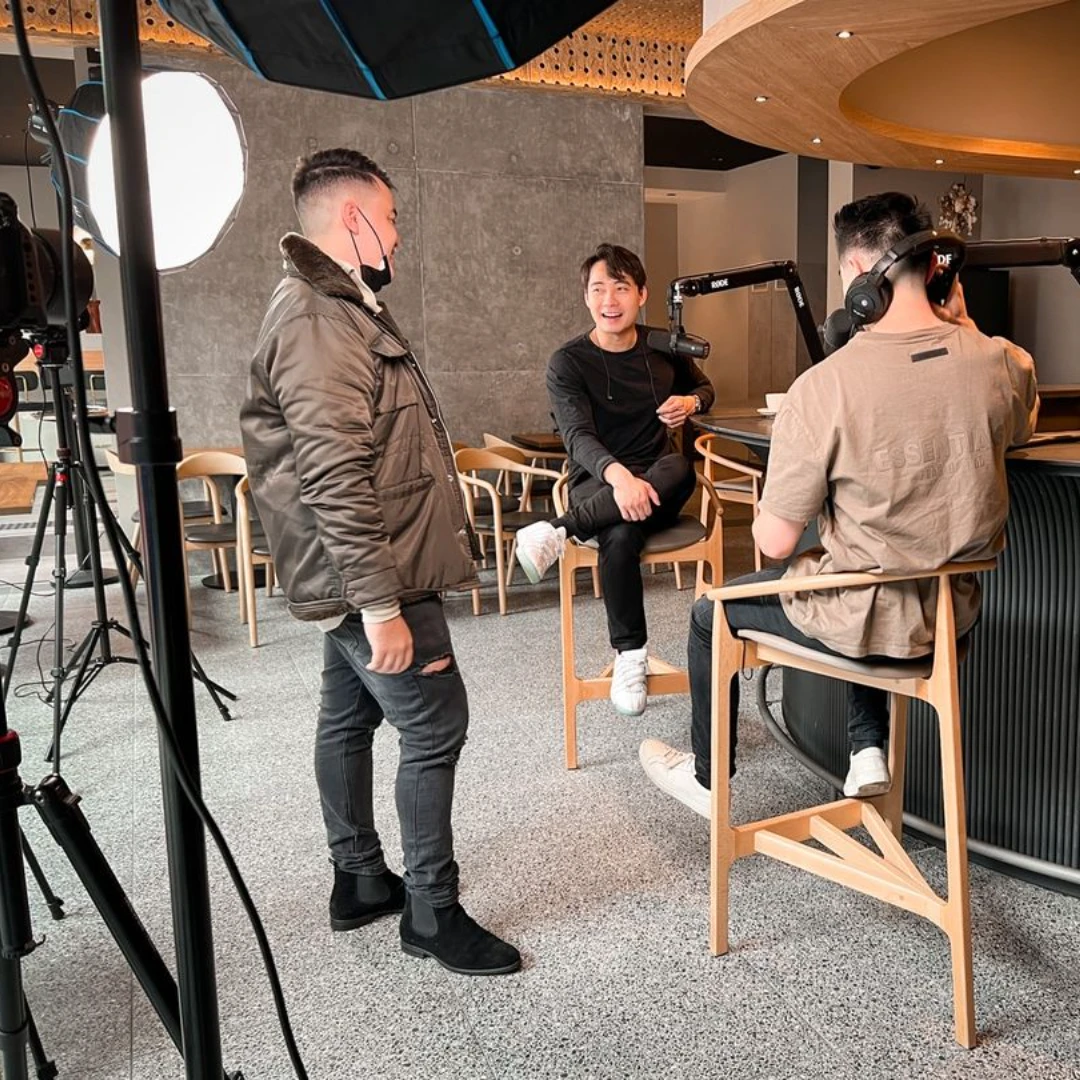
Many of the interviews he shoots require at least two or three cameras (normally cross shooting the talent and presenter), and the subjects being discussed can cover a variety of topics, anything from light-hearted to highly emotional, serious or sensitive. So, it’s important to be prepared for anything, such as people who may be very nervous, not sit still, cry or even get up and walk out mid interview. Andy tries to make everyone comfortable, himself included, and avoid any disruptions once the interview begins.
Andy normally works on his own, without any assistance other than a sound recordist – if he’s lucky! Here Andy shares some of his tried-and-true tips which he checks off for every interview he shoots.
SCOUT THE LOCATION
The first thing to do when preparing for an interview is to recce or identify an appropriate location, ideally a large, quiet space with lots of depth and an interesting background. It’s important to start with a blank canvas, so switch off any existing lighting in the room, particularly overhead fluoroes, or downlights.
Sound is very important too – the space should be very quiet with good acoustics – and listen for intermittent background sounds like construction, traffic or aircraft noise. Low-level constant background sounds like air-conditioning can be reduced in post-production if you remember to record 30 seconds of “atmos” or “buzz-track” what the American refer to as “room-tone”.
“I’d normally shoot a sit-down interview indoors. I try to avoid exterior locations due to distracting background noises and inconsistent ambient light – which can constantly mess with your exposure on a windy and cloudy day,” says Andy. He would usually prefer to shoot the master interview before filming any overlay or b-roll, it’s good to listen to the talent speak first, it may give you ideas about what sequences are most relevant.
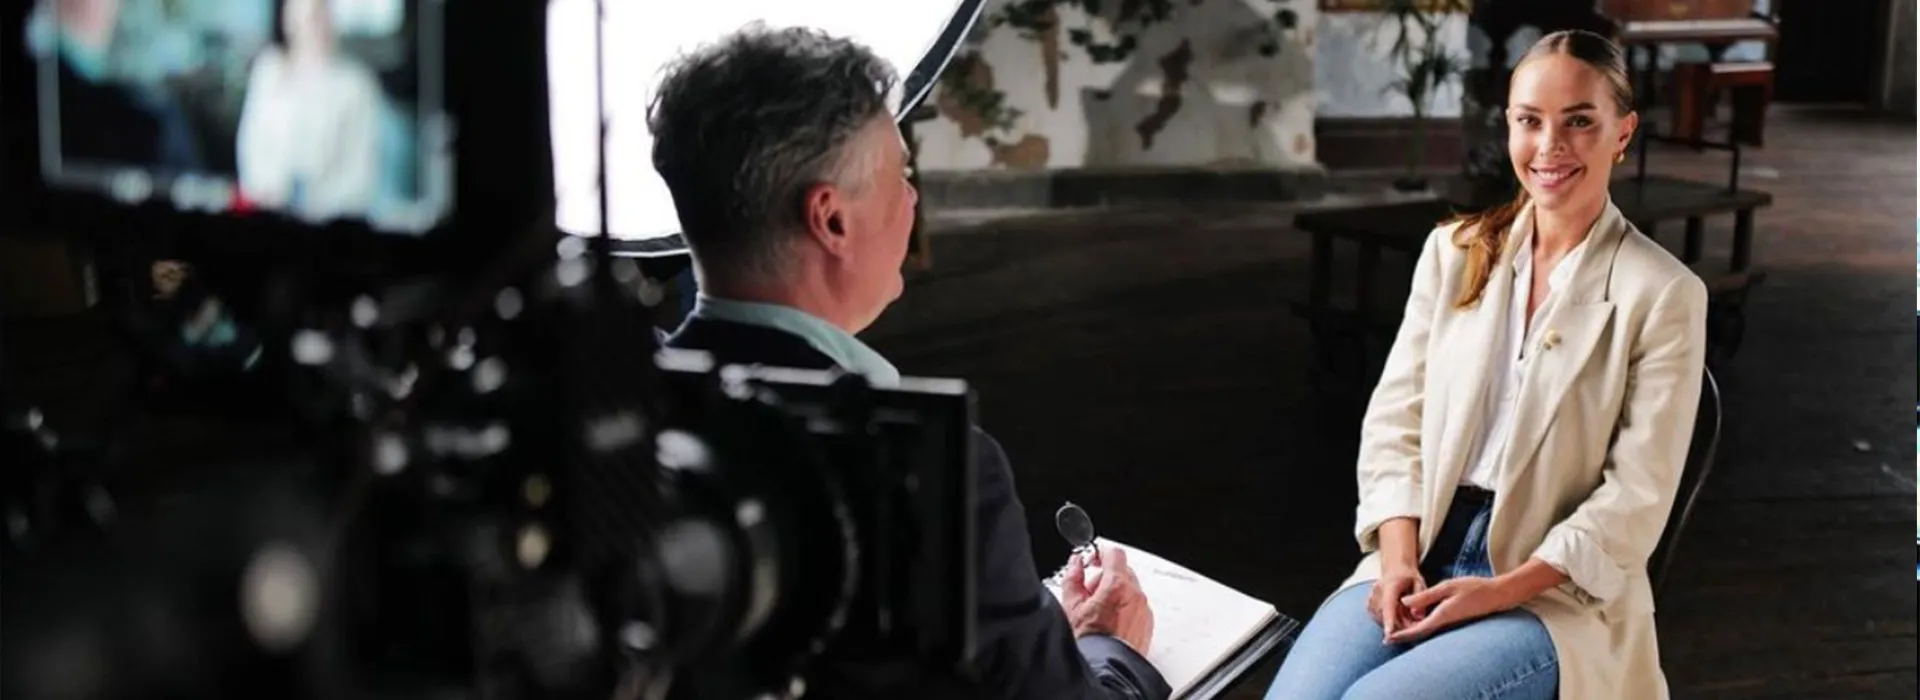
Once he and the producer have decided on the location and eye-line (but before setting up the equipment), he positions the chairs in the centre of the room facing each other and walks around trying to pre-visualise the lighting, camera angles and how much of the background will be seen. The aim is to create shots that cut together naturally with matching light, depth, and backgrounds with interesting textures and features.
“There should be plenty of depth behind each of the subjects,” says Andy. “I often shoot into the corner of a room to exaggerate perspective. It’s tricky to fine tune the background for each camera, and a bit of a balancing act to adjust your lighting, camera angles and lenses, whilst managing to keep all your equipment out of shot.”
“I like a soft and textured background which is balanced, with features that are not too distracting or busy – often less is better. Doorways, windows, timber, bookshelves and wallpaper are all usually visually interesting. You don’t want decor like lamps or pot plants that are too obvious, he says. “The viewers eye should be drawn to what is being said on screen, not something growing out of the talents head in the background.”
“A sense of depth can also be achieved by using cameras with full frame sensors and fast prime lenses with the aperture wide open (< f2.8). Focus is difficult and critical at f1.2, but with a very shallow depth-of-field and careful lighting the images will pop, look very cinematic and pleasing to the eye.”
“Try to use comfortable upright chairs or stools that don’t swivel (twisting makes people look nervous on screen) and sitting in lounges can make them appear to slouch. Position the chairs in the middle of the room, making careful adjustments to achieve a tight eye-line, without getting your lights or other cameras in shot.”
USE AT LEAST THREE SOURCES OF LIGHTING
Lighting can make or break an interview and is particularly important in achieving a cinematic look. Andy uses at least three light sources and spends most of his set-up time fine tuning the lighting. He has a reasonably simple but effective method which gives him a consistent look which is quick to setup and easy to replicate for each interview.
Andy’s set up time from arrival to rolling is generally less than one hour. While it’s not ideal to be rushed, most producers and presenters normally like to be filming as quickly as possible. Arranging a location with good access for gear and nearby parking can make your life much easier.
“I prefer a large soft light source as my key light source, positioned on the ‘looking room’ side of the frame, slightly higher than the talent’s face at about 45-60 degrees off the eye-line. Using two soft lights cross lighting your talent and presenter will provide more control and give you a better wrap effect, but beware of lens flare,” Andy warns.
“This large soft light will achieve a nice wrap around the subject’s face and gently drop off into the shadows, introducing some shading which adds a further sense of depth to the image.”
Next, Andy adds some fill light (usually just a white reflector) from the opposite side, to lift the other side of the face slightly out of the darkness. The position of the key and the amount of fill depends on how flat or moody he wants the subject to appear. Occasionally he will use ‘negative fill’ (a black reflector), if there is too much ambient or reflected light in the room.
“I might complement these key/fill lights with a very subtle back-light and an eye-light from slightly below, to further light the subject under the chin.”
Finally, Andy will concentrate on lighting the background of each shot. “Sometimes I include available light like a window as a feature behind the main talent. With a large sensor and fast lenses, this can look great if it’s completely out of focus – even if it’s blown out or clipping (overexposed),” Andy explains.
THE FINER CAMERA DETAILS
Whilst utilising the appropriate camera specs and lenses is something that comes with experience, Andy shares the approach he uses for many of his cinematic interviews.
He always films with large sensor cameras and fast glass. Andy owns and operates the Arri Alexa Mini LF camera and Signature Prime lens, plus the Canon Cinema EOS C500mkii full frame camera with a selection of Canon cine-primes. He also uses the Canon Cinema EOS C70 super 35mm camera and EOS R5C full frame camera with RF lenses, which he mainly uses as ‘locked off’ cameras, which he monitors remotely, relying heavily on Canon’s face/eye detect auto-focus system.
Andy’s top five tried and true camera tips:
- Shoot with large sensor cameras and very fast lenses, with the iris wide open to minimise the depth-of-field and soften the background.
- Expose the image with internal/external ND filters or by dimming the lights (or slightly adjusting the camera ISO).
- Use large soft lights as your main source, positioned as close as possible to the talent without getting them in your shots. Egg crates (fabric grids) on your soft box will help control any light spill.
- Never colour balance the camera, decide on either tungsten or daylight (3200K/5600K) and set the colour temperature on all cameras accordingly. Use cameras with the same colour science that can be graded to match.
- Film in 4K Log if possible, at either 25p with 1/50th sec shutter (180 degrees) which emulates the look a film camera (assuming you are in Australia or another country working at 50Hz). The shutter speed should always be a multiple of 50, especially if shooting slow motion (to avoid lights flickering).
“If you’re shooting on more than one camera, make sure to triple check that the framing, colour temperature, resolution, frame rate, shutter, ISO and exposure settings match on each camera,” he says.
PLAN THE SHOTS AND EYELINES
Camera placements will ultimately depend on how many cameras you have at your disposal. Andy will generally use at least two on the talent placed next to each other, this allows for a mix of both wide and tight shots and is very helpful in the edit. The wider shot is normally an MCU (medium close-up) or MS (mid shot), and the tighter shot is a CU (close-up).
A third camera can be positioned to cross-shoot the presenter/reporter if required, usually an MCU or Mid Shot, filming over the talents shoulder. Other options are a ‘dirty wide shot’ which shows all the camera and lighting equipment, or a dolly/slider shot filmed from a side angle.
If you’re working with a one camera and minimal equipment, do not fear. Andy says it’s still possible to cut between wide to tight shots with a single camera. “Two cameras are best, but one camera can be enough if you shoot in 4K, this will give you the option of cropping in on the wider shot and still maintain a HD resolution image.”
The talents eyeline depends on the position of the camera, normally this is dictated by the style of the production and what the producer/director has requested. Think about how the shots will edit together, and obviously do not ‘cross the line’.
Andy usually aims for a very tight eyeline with the lens positioned just over the talents shoulder, at eye height and just out of view from the other cameras – either a right to left (R-L) or left to right (L-R) eyeline. It’s worth considering the direction of the eye-line before you set up your equipment, talent with different opinions on the topic being discussed are normally better off with opposing eyelines in the final cut.
Alternatively, some productions prefer the eyeline to be ‘straight down the barrel’ which is where the talent look directly to camera. “For the latter, I use a simple device called an Eye Direct,” says Andy. “This allows the talent to feel more relaxed and comfortable because they are looking straight into the camera lens, but they can see the interviewer through a series of mirrors, which maintains a direct eye-line, often adding to the impact of what is being discussed.”
BE PREPARED FOR LONG SHOOTS
Finally, make sure everyone is comfortable with a glass of water before the cameras start rolling – interviews can often go for hours! Remember to switch off all mobile phones, the industry standard penalty for a phone buzzing is a case of beer for the entire crew.
Once the shoot begins, Andy says it’s important to keep yourself and others out of the eyeline where possible so there are no distractions for the talent or person asking the questions.
“I try to make sure that I have enough camera cards and batteries on hand. Sometimes I’ll even run external power and data wrangle on the run, especially if I’m filming extra-long interviews – it’s always best to be over-prepared.
“For this I always use my G-DRIVE™ PRO SSD, its super-fast transfer speeds save me hanging around set for hours, or having to courier drives with footage at a later date,” says Andy. “I always make at least two copies of all of the camera rushes, and prefer to hand one copy to the producer at the end of each day.”
SHARE THIS POST
RELATED ARTICLES
JOIN THE COMMUNITY
Sign up and be a member today! Unlock promotional deals, Mentor advice, event invites, competition prizes, and showcase your work to the wider industry.
Submit your best travel image from 5 September – 5 October 2022 and go in the running to win a SanDisk Professional G-DRIVE SSD 4TB for this month’s Travel Image Competition! Signing up will also grant you access to exclusive deals and promotions, competitions and much more.
—— OR ——
By clicking on “Submit”, you agree to Western Digital’s Privacy Statement and SanDisk Professional Academy Terms and Conditions.
Be Part of the Creative Professional Community
Become a member to gain access to heaps of perks, from expert Mentor advice to product deals and giveaways.
